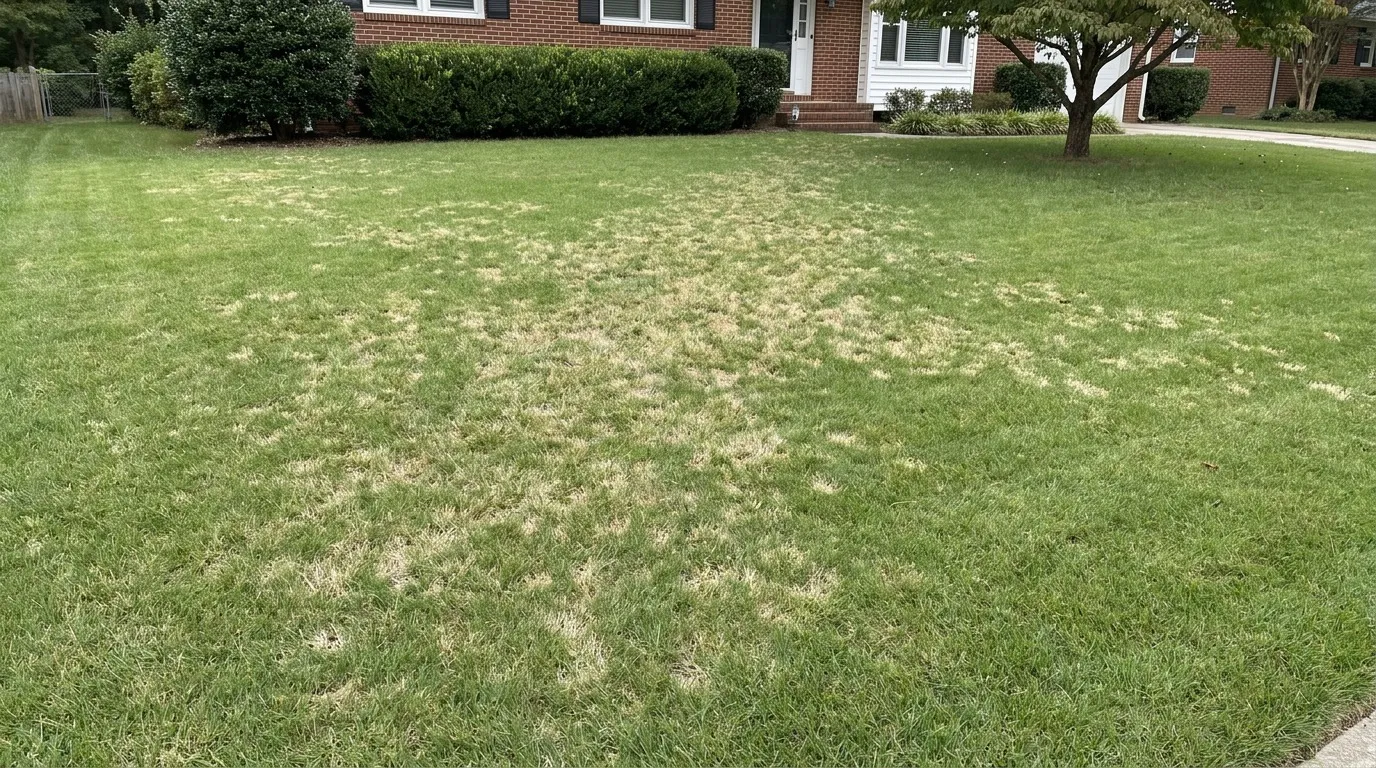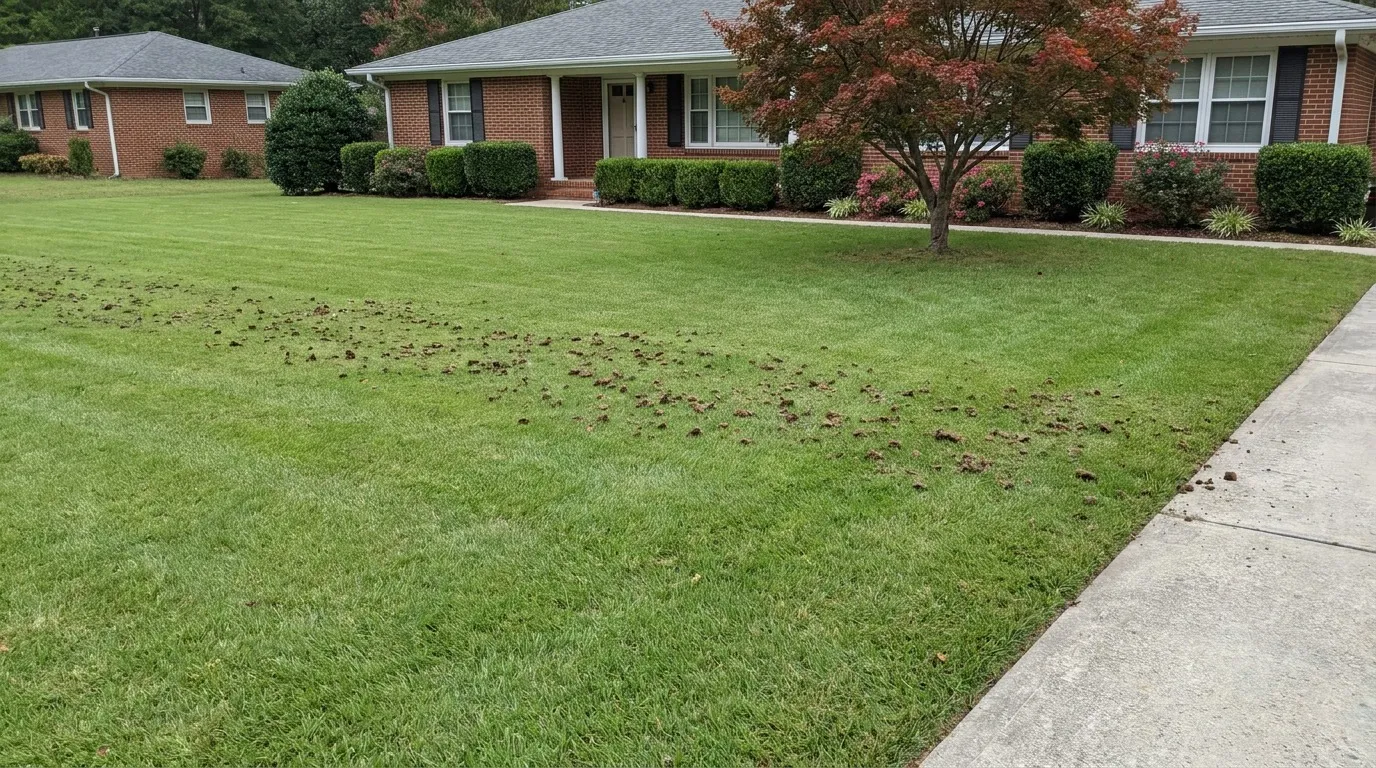
The Screwdriver Test: How to Check Your Soil Compaction This Weekend
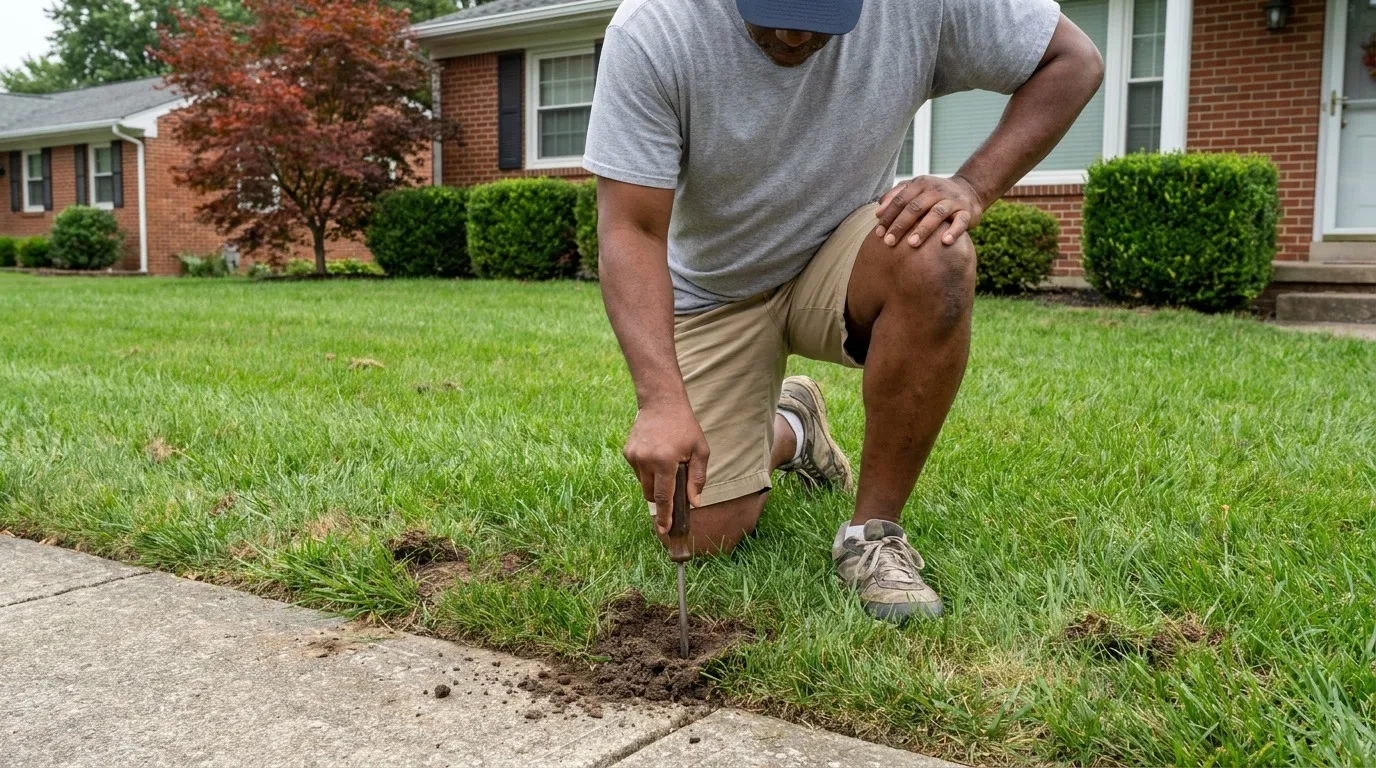
To test soil compaction at home, wait two to three days after rain so the soil is moist but not muddy, then push a six-inch flathead screwdriver straight into the turf. If it slides in with hand pressure, the soil structure is intact. If it stops before three inches or needs body weight, the soil is compacted. Add a soil probe reading and a jar infiltration test to complete a full three-check protocol in one Saturday morning.
You have read that compacted soil is what is holding your lawn back, and now you want a way to prove it before you spend a dollar on aeration. Good instinct. The screwdriver, a cheap soil probe, and a mason jar are the three tools that will tell you what a professional soil assessment costs money to confirm. This guide walks you through the full protocol, including the interpretation table that turns a resistance reading into a real next step.
Nature's Select® has run hollow-tine core aeration on North Carolina lawns since 1994, and our technicians still start every on-property visit with a screwdriver in one hand and a soil probe in the other. The methods are the same ones that cooperative extension turf specialists use, right down to the two- to three-day post-rain window and the five-spot sampling grid. Set aside forty minutes this weekend and you will know whether your soil is the problem, whether it is one piece of the problem, or whether the answer is somewhere else entirely.
Why a Home Soil Compaction Test Is Worth Doing First
Before you rent an aerator, book a professional visit, or lay down another round of fertilizer that will not reach the root zone, you want a rough bulk-density reading. That is what these three tests give you. A screwdriver reading is not a laboratory Proctor compaction test with a cylindrical mold and a standardized rammer, but it maps closely to what commercial penetrometers measure in the top six inches of soil. That top six inches is where hollow-tine core aeration does its work, and where root growth actually lives on a residential lawn.
The other reason to test first is diagnostic. The visible symptoms of soil compaction overlap with thatch, disease, and shallow watering. A homeowner who mistakes a thatch layer for compaction will spend on aeration and get thin results, then blame the service. The screwdriver test tells you which problem you actually have, and it tells you in the same fifteen minutes it takes to boil water.
Testing soil compaction on your own also builds understanding. Once you have run the tests and can read the results, the science behind soil compaction stops being abstract. Soil compaction occurs when foot traffic, machinery, mower weight, and dry-wet cycles collapse the small open cavities (soil pores) that healthy soil needs. Compaction of soils reduces air and water movement, restricts plant roots, and depresses microbial activity, which is why an untreated compacted lawn slowly loses plant health from the roots up.
If you have not already walked your lawn against the six signs before you test, start there. This article picks up where the visual check ends and gives you the physical proof.
Test Conditions That Actually Matter
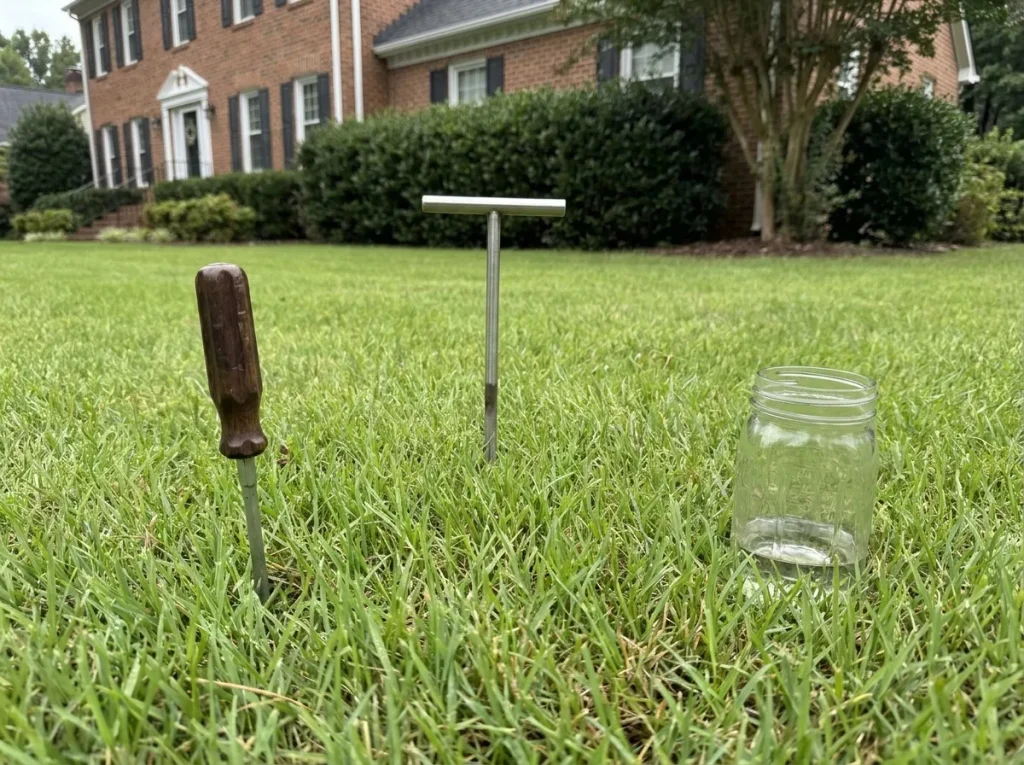
The three tests below assume you have picked the right day. Skip this section and your readings will be noise. Both the screwdriver and the probe measure resistance to penetration, and resistance changes with moisture content in ways that will fool you if you test on the wrong day.
- Moist, not muddy, not dry. Two to three days after a normal soaking rain is the sweet spot. Dry soil resists everything and can make healthy ground look compacted. Muddy soil offers no resistance and will make severely compacted ground appear intact.
- Same soil texture and soil temperature range across all test spots. A shaded northern strip in October will read differently from the sun-baked front yard. Test the same day so temperature and moisture are consistent across your grid.
- Five spots minimum, ten if you can. Compaction concentrates unevenly. A five-spot grid across a typical quarter-acre lawn catches the traffic paths, the mower turnaround, an untraveled corner, a mid-yard flat, and the front edge near the driveway.
- Steady, even pressure with the rod. Push the screwdriver or the manual compaction rod straight down at a uniform rate, not in bursts. The reading you want is the one where the resistance rises, not the one where the tool bounces back.
- Log the readings. A field notebook or a phone note keeps you honest. Depth in inches, pressure required (hand, forearm, body weight), and a location description. You will forget half of it by lunch if you do not write it down.
The bare soil and dry wood-chip mulch spots around the edge of the lawn serve as useful controls. A screwdriver reading in a flower bed with two inches of compost and organic matter worked in will slide six inches down with a finger push, and that becomes the reference you compare against.
Test 1: The Screwdriver Test (Five Minutes)
The screwdriver test is the closest thing to a universal DIY compaction check, and it is recommended by Rutgers Cooperative Extension as the first-line homeowner method. It costs nothing if you already own the screwdriver, and the results map cleanly to whether hollow-tine core aeration is the intervention that fits your lawn.
What You Need
- A six-inch flathead or Phillips screwdriver. Longer is fine. A blade under four inches is too short to read the compaction zone.
- A moment of patience and even hand pressure.
- Optional: a permanent marker to score depth markings on the shaft at one, three, and six inches.
How to Run It
Push the screwdriver straight down into the turf at the first test spot using even hand pressure. Note the depth where progress becomes difficult. Repeat at each of the five spots. Track three readings for each: depth reached with hand pressure, depth reached with forearm weight, and whether body weight is needed to pass six inches.
Traffic zones and mower turnarounds will read differently from an untraveled corner or a flower-bed control. That contrast is diagnostic. If the driveway edge and the walkway margin resist while an untraveled corner behaves normally, you are looking at traffic-driven compaction, which is exactly what hollow-tine core aeration is designed to correct. If the screwdriver meets resistance everywhere, including the untraveled corner, the compaction is deeper and structural, and a professional soil probe reading is the next right step.
How to Read the Result
| Screwdriver Reading | What It Means | Recommended Action |
|---|---|---|
| Slides six inches with hand pressure | Soil structure is intact in the top zone | Aeration not indicated; look at other causes |
| Stops between three and six inches, some progress with forearm weight | Moderate compaction | Annual core aeration matched to grass type |
| Stops at one to three inches, needs body weight | Severe compaction | Book a professional soil assessment |
| Cannot pass a surface crust at all | Surface sealing plus deeper compaction | Core aeration plus biological amendment |
A single hard reading is a data point. Three or more hard readings across the grid is a pattern, and a pattern is what you act on. If the readings cluster in traffic zones only, plan aeration on the whole lawn but focus the two-pass work on those zones during a professional visit.
How the Screwdriver Compares to a Compaction Tester or Penetrometer
A commercial compaction tester (also called a penetrometer or manual compaction rod) reads pounds per square inch on a scale, from analog dial compaction gauges to digital recording compaction meters that log depth and pressure at every inch. The screwdriver reading is a coarse proxy for the same measurement. You cannot get a numeric reading in pounds per square inch, but you can rank spots against each other reliably, and that ranking is what tells you whether the compaction problem is local or system-wide.
Test 2: The Soil Probe Reading (Fifteen Minutes)
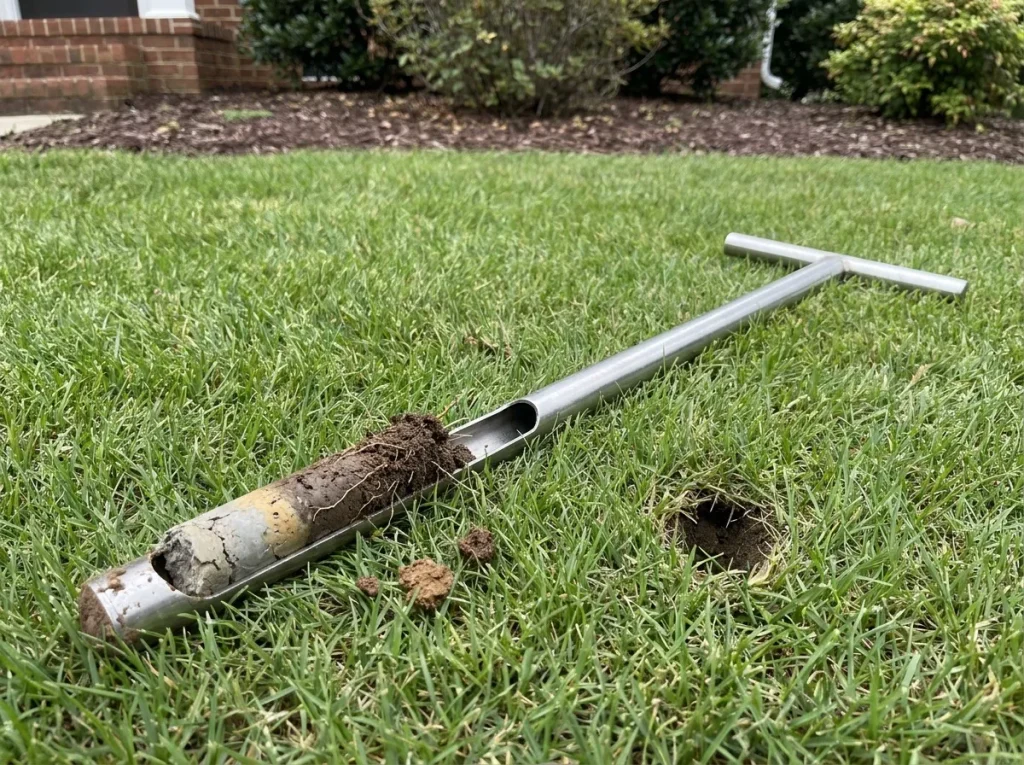
A soil probe is a hollow stainless-steel tube with a T-handle and a slot along one side. You push it into the ground, twist it a quarter turn, and pull up a two- to four-inch soil core you can look at, smell, and feel. The tool costs between thirty-five and eighty dollars at a garden center and pays for itself the first time you avoid an unnecessary aeration visit.
What the Core Tells You
Push the probe six inches into the turf at each test spot, twist, and pull the core straight out. You are looking at four things:
- Layer transitions. A dark topsoil layer sitting above an abrupt pale-gray clay layer at two or three inches is a compacted layer boundary, sometimes called a plow pan layer on farmland or a construction pan on residential lots. You cannot see this layer from the surface, but the probe pulls it up whole.
- Root depth. Healthy tall fescue in central North Carolina roots four to six inches deep by fall. If every core you pull shows a mat of roots that stops abruptly at two inches, that is compaction expressing itself in the biology. Roots hit the compacted layer and turn sideways.
- Root shape. Straight downward roots signal healthy porosity and sizable pores. Roots that bend at 90 degrees or wrap around each other in the top two inches signal abnormal root growth against a layer they could not penetrate.
- Moisture profile. A moist top inch with a bone-dry three-inch layer below it means water infiltrated the surface and stopped at the compacted layer. That is why watering the lawn does not reach the roots.
If you cannot afford a probe, a bulb planter with a sharpened edge will pull a rough core out of most residential lawns. The read is coarser, but the layer transition and root depth are still visible.
Log Your Probe Readings
For each spot, note the depth of the topsoil layer, the depth where roots stop, and any visible layer boundary. Five spots take about 15 minutes end-to-end. If more than three of the five spots show a root-stop above three inches or a visible layer transition, compaction is the structural problem holding the lawn back.
Test 3: The Jar Infiltration Test (Overnight)
The last check uses a mason jar and thirty seconds of your time to give you a water-movement reading the other two tests cannot. Water infiltration is the practical outcome of pore structure, and pore structure is the physical property compaction destroys.
How to Run It
Cut both ends off an empty aluminum can or use a wide-mouth mason jar with the bottom removed. Push the ring three inches into the turf at a test spot. Fill it with a measured amount of water, one cup, and note the time it takes for the water to fully soak in. Repeat at three spots.
How to Read the Result
- Under two minutes. Infiltration is healthy. Compaction is not the primary issue.
- Two to ten minutes. Moderate compaction or a thin surface seal. Annual aeration will help.
- Ten to thirty minutes. Severe compaction across the sampled zone. Book professional aeration inside the correct window.
- Water still standing after thirty minutes. Surface sealing plus deep compaction. Aeration plus a biological soil amendment is the right combination.
This is the test that catches surface-crust problems the other two miss. Central North Carolina clay, especially the weathered Cecil-series soils under much of Guilford, Forsyth, and Orange County, seals into a surface crust during dry weeks, especially after a hard rain that beats fine soil particles into the top layer. The crust reads normal to a screwdriver push but blocks water almost completely. The jar test is the only one of the three that exposes that pattern. USDA NRCS soil quality field guides describe a single-ring infiltration measurement as a standard indicator of structural drainage failure in the topsoil layer (USDA NRCS Soil Quality Kit).
Interpreting All Three Tests Together
The strength of this protocol is that the three tests measure three different soil properties. The screwdriver measures resistance to penetration, the probe measures root behavior and layer transitions, and the jar measures water movement. Compaction usually shows up in all three, but the pattern of which ones fail tells you what is happening below the surface.
| Screwdriver | Probe | Jar | Diagnosis | Next Step |
|---|---|---|---|---|
| Passes 6 in | Roots to 6 in | Under 2 min | Soil structure intact | Check watering, mowing, or nutrition |
| Fails at 2-3 in | Roots stop at 2-3 in | 10-30 min | Compacted layer in the root zone | Core aeration matched to grass type |
| Fails everywhere | Cores show plow pan | 30+ min | Deep structural compaction | Professional assessment before aeration |
| Passes 6 in | Roots to 6 in | Standing water | Surface sealing without deep compaction | Biological amendment, no aeration needed |
| Passes 6 in | Spongy core, thatch layer | Under 2 min | Thatch layer, not compaction | Dethatch, not aerate |
The last two rows matter because they are the readings that keep you from wasting money. A lawn with a sealed crust or a heavy thatch layer looks compacted on a screwdriver, but the probe and the jar catch the actual problem. Follow the three-test protocol and you avoid the classic homeowner mistake of aerating a lawn that needed a different intervention.
What to Do With Your Results
You are going to fall into one of four buckets. Match yours and move.
- All three tests pass across most of the grid. Compaction is not your primary issue. Check your watering depth (six to eight inches per event, not daily light applications), your mowing height (three to four inches on tall fescue), and your soil pH. NC State Extension notes that a routine soil test through the state laboratory identifies pH and nutrient gaps that cause lawn thinning even when soil structure is intact (NC State Extension Soil Testing). A soil test costs under twenty dollars and rules out a nutrient gap.
- One or two tests fail in specific zones. Local compaction. Plan annual aeration inside the correct soil-temperature window and focus the professional two-pass work on the affected zones. Tall fescue lawns aerate mid-September through mid-November across central North Carolina. Warm-season bermuda and zoysia lawns aerate in late spring, typically May through June.
- All three tests fail across three or more spots. Structural compaction. This reading justifies a professional visit. A soil probe reading combined with a bulk-density check tells you whether aeration alone will fix it or whether a biological amendment needs to run alongside.
- Screwdriver passes; jar fails; probe shows a spongy layer. Thatch or crusting, not compaction. Different intervention entirely, and running an aerator will not help.
Anywhere the pattern indicates structural or severe compaction, the fastest way to get a reliable bulk-density reading is to book a professional soil assessment with a technician who can pair the DIY protocol with a penetrometer reading and a written aftercare plan. Central North Carolina clay behaves differently than the loam soils covered in generic US aeration content, which is why clay changes what you find when you run these three checks.
Preventing Soil Compaction After You Fix It
Once aeration relieves the current compaction, you want the fix to hold. The main drivers of ongoing compaction on residential lawns are foot traffic on wet ground, mower and vehicle weight in the same wheel path every week, and dry-wet cycles on bare soil. Rotate mower patterns each cut, keep the mower off soggy turf, work an inch of compost into thin areas each spring, and top-dress lightly after aeration to add organic matter that supports soil biology. NC State Extension TurfFiles guidance on core cultivation confirms that hollow-tine aeration paired with regular organic top-dressing keeps pore space open longer than aeration alone on clay-heavy residential sites (NC State TurfFiles). These small habits keep the pores open longer between aeration cycles.
Key Takeaways
- Wait two to three days after rain so the soil is moist, not muddy or dry, before running any of the three tests.
- The screwdriver test takes five minutes and reliably identifies compaction in the top six inches of soil.
- A soil probe reading confirms whether roots stopped at a compacted layer boundary and rules out thatch or crusting confusion.
- The jar infiltration test exposes surface sealing problems that a screwdriver reading alone misses.
- Compaction usually fails all three tests; single-test failures point to a different intervention.
- Three or more failed readings across a five-spot grid is the threshold that justifies professional aeration.
Frequently Asked Questions
Can you do your own soil compaction test at home?
Yes. The three-test protocol above (screwdriver, soil probe, jar infiltration) is the same set cooperative extension turf specialists recommend as a homeowner first step. The screwdriver alone will give you a rough reading in five minutes. Adding the probe and the jar strengthens the diagnosis and rules out thatch or crusting problems that look like compaction on a screwdriver but need a different intervention.
How can I tell if my soil is compacted without a screwdriver?
The soil probe reading and the jar infiltration test both work independently of the screwdriver. Pull a two-inch core with a probe or bulb planter and look for a mat of roots that stops abruptly above three inches or a visible pale-gray layer boundary. A jar of water that takes more than ten minutes to soak in through a ring pushed three inches into the turf is a strong infiltration signal. Two of the three tests failing is a reliable pattern.
Why does moist soil matter for the test?
Because both the screwdriver and the probe measure resistance to penetration, and resistance changes with moisture content and water content. Dry soil resists everything and makes healthy ground read as compacted. Muddy soil resists nothing and makes severely compacted ground read as intact. The two-to-three-day post-rain window puts soil at field capacity, which is where the readings map cleanly to actual bulk density.
How many test spots do I need across the lawn?
Five spots minimum. Ten if the lawn is larger than a quarter acre or if the traffic and shade patterns vary a lot. Include one control spot in an untraveled corner or a flower bed for comparison. A single hard reading is a data point. Three or more hard readings clustered in one zone or scattered across the grid is a pattern you can act on.
Is a Proctor compaction test different from these home methods?
Yes. A Proctor compaction test (and the modified Proctor test) is a laboratory procedure that packs a soil sample into a cylindrical mold with a standardized rammer to measure maximum dry density at optimum water content. It is used in construction, geotechnical engineering, roadway, and embankment work, not residential lawn care. The screwdriver, probe, and jar tests above are homeowner-scale versions that measure the same underlying properties (resistance, structure, and infiltration) with tools you own or can buy for under a hundred dollars.
What causes soil compaction on a lawn?
Soil compaction on residential lawns is caused by foot traffic, mower and vehicle weight, silt buildup, and dry-wet cycles that collapse soil pores. Bare soil and thin canopy make the problem worse because there is no root system to hold the structure open. Compaction reduces air and water movement and depresses plant health from the roots up.
How do you fix compacted soil?
Hollow-tine core aeration is the primary fix. It pulls plugs out and relieves compaction where spike aerators only push soil sideways. Add organic matter through compost or top-dressing to feed soil biology and hold the pores open longer. On severely compacted ground, aeration plus a biological amendment often runs together.
What if my results are borderline?
Borderline is common. Run the tests a second time a week later after another normal rain event. If the pattern persists, treat borderline as one signal short of severe and book an on-property assessment during the aeration window. A professional penetrometer reading resolves the ambiguity and gives you a bulk-density number the DIY tools cannot produce directly.
Conclusion
Three tests, one Saturday morning, and a real answer. The screwdriver, the soil probe, and the jar tell you whether the ground under your lawn is the reason it looks tired, or whether the money belongs somewhere else. Run the protocol before you rent a machine or book a service, log the readings, and let the pattern decide. If three or more of the readings point to structural compaction and you want the work done inside the correct soil-temperature window with a written aftercare plan, book a professional soil assessment with Nature's Select® or call (888) 786-9735 for a free on-property visit across our North Carolina service area.